Friday 30 October 2015

Scary at Stampotique


I don't join in the challenges over at Stampotique very often - partly because half the time the challenge is over before I've got my butt in gear. But this week I've been inspired by the theme Scary Confusion for my Halloween make.

Moon Girl is my favourite stamp of all time ever and I've used her again here to make a little ATB, Moon Girl is definitely in a state of confusion because she's lost her angelic wings and turned into a witch! I suppose she isn't all that scary but I hope she fits the theme anyway!

The various stamps (all Stampotique) are gently watercoloured with Distress Inks before being assembled together and stuck onto a stick which is secured to the bottom of the ATB with a big blob of Pinflair Glue Gel. The ATB box is made from, and decorated with, papers from Graphic45 - a mix of Rare Oddities and Steampunk Spells.

I'm also entering her for the Something Wicked Challenge at Frilly and Funkie :).


Continuing the Halloween theme, I'm also sharing an ATC I made - this is one I started at a France Papillion workshop last year but only recently finished. A winged demon rising from hell - this one's definitely a wee bit more scary! The licking flames are actually Jo Capper-Sandon's foliage stamp - probably my next favourite Stampotique after Moon Girl - at least one of my most used.

Happy Halloween everyone!

Katy x

Thursday 29 October 2015

Guest Designing for Noor!


My turn to be Guest Designer again at Noor! today. I made a vintage Christmas decoration and above is a sneak peek - you can see my full post here.

Katy x

These are the Noor! Design products I used for my make:

Saturday 24 October 2015

I Love Halloween!


It's true - I do :). Today I am sharing a little something made from Graphic45 papers and an arched frame kit from Tando Creative. It's currently sitting on my mantelpiece ready for the 31st.


There's not a whole lot to say about this piece - it's just lots and lots of layers of papers and fussy-cut elements forming a spooky collage. The papers are a mix of the Steampunk Spells and Rare Oddities collections.


Although it's simple I do like the impact of all those patterned paper elements - I was going for a look suggestive of a spooky apothecary's library so hopefully I achieved that.

I am entering this for the following challenges:


Mixed Media Monthly - Halloween Wordsearch (words bat and skull - and probably a few others!)

Thanks for stopping by - and Happy Halloween!

Katy x

Friday 23 October 2015

Guest Designing for Noor! Design


I am delighted to have been asked to guest design for Noor! Design UK this month. I was sent some lovely goodies and I started out with some seasonal makes with the Let It Snow Paper Pad.


Details of the card are on this post and details of the scrapbook page can be found here.

Below are links to all the lovely Noor! goodies I used in my creations.

Katy x

Thursday 22 October 2015

Wish Canvas for Rubber Dance


Here's a sneak peek for you of my tiny canvas - the full tutorial can be found over on the Rubber Dance blog today.

I used a range of media including ColourArte Silks and Gelatos, and of course Rubber Dance stamps including my Affirmations set.

Readers of my blog can use code katy15 on the Rubber Dance website to get 15% of your entire order!

See you soon,

Katy x

Affirmations set, designed by moi!

Monday 19 October 2015

Bird on the Block


Today I am sharing a wee little Christmas decoration with a vintage feel. I love the vintage look at Christmas!

I used Rubber Dance stamps (of course) for this creation - including one of my own sets called Christmas Cheer and Tags.

If you'd like to make this little birdie he's available as a kit from my etsy shop for just £5 plus P&P.


Katy xxx

I used these Rubber Dance stamps:

Christmas Cheer

Cozy Christmas


Thursday 15 October 2015

ColourArte Sneak Peek!


My turn over at the ColourArte blog today - here's a sneaky peek of my creation. We are creating for Breast Cancer Awareness this month, hence the pink!

K x

Friday 9 October 2015

Spooky Spells


I LOVE Halloween but I haven't had a lot of time for Halloween makes this year. I have however found the time somehow to make this fun altered book box for the DecoArt Haunts Challenge!

Now, seeing as the judge is Mr Andy Skinner I obviously won't be in line to win! But still, having joined the fantabulous Helping Artist Programme at DecoArt, I wanted to take some time to experiment more with the DecoArt range of products and this seemed like an ideal opportunity for a good old play.


The box is covered with lightly scrunched tissue paper to give it a creased leathery look then coated with DecoArt Media Black Gesso - ONE coat my friends - this product is awesomeness in a pot. I then added some stringy fabric I got in the Halloween section at Wilko's and added more gesso over the top. I followed that with a light smearing of DecoArt Metallic Lustre in Silver Spark then Champagne Ice to bring out the textures of the tissue and string. The webs are die cut (Tim Holtz for Sizzix) in white card and given a wash of Payne's Grey paint from the Media line. I blended the edges of the webs into the background with more black gesso before highlighting some areas again with the Metallic Lustre in Silver Spark. My spiders are plastic kiddies ones given a coat of black gesso then a touch of Quin Gold Media paint.


Behind the aperture I added some book page covered in strips of mummy's bandage! The bandage is created with torn pieces of calico dyed with Distress Sprays in Antique Linen, Hickory Smoke and Tea Dye, then glued down in rows onto the book page. I love this!!!


My MDF skull (The MDF Man - he does the NEC show amongst others) is painted with white gesso to undercoat it before I slapped on a great load of DecoArt Media Crackle Paste with a palette knife. I varied the thickness to get an uneven crackle - the thicker paste gives bigger cracks. Cool or what? Only thing I don't like about this crackle is I need patience with it (patience I do not have in spades!) as this took a good 8 hours to dry properly (it was VERY thick). Worth it though, heh? When dry I covered the whole thing with DecoArt Antiquing Cream in grey. I didn't actually let it dry as per the instructions because I wanted the skull to have plenty of white remaining, so I wiped it straight back with a baby wipe so mostly it was left in the cracks. I then added black Antiquing Cream around the edges and under the eye sockets - again I didn't let it fully dry before removing the excess as I didn't want it too dark (I also didn't want to scrub too hard at the crackle as it can come off if you are very heavy-handed).


Finally (did you get this far? Well done!!!) I did some faux metal effects on this die cut bookplate and also on the metal corners and keyplate. This is black gesso, then DecoArt Sand Texture Paste, then DecoArt Metallic Gold paint, then more black gesso then Quin Gold - the latter two just applied in places with my finger. On the metal items, I used Metallic Lustre instead, adding it last after the Quin Gold rather than before. The brads are bashed with a hammer and then brushed with black gesso. Hard to see here but the insert in the bookplate is also distressed with Distress Sprays - same colours as used for the bandages.

Phew! Sorry that might be information overload!!

Thanks for visiting today! And if you want to learn more about DecoArt stuff I have just started out doing workshops in Bromsgrove (England) - info on my Facebook page.

Katy x

Friday 2 October 2015

New Challenge at Rubber Dance

Yep, another month has rolled on by and so it's time for another Challenge over at the Rubber Dance blog.


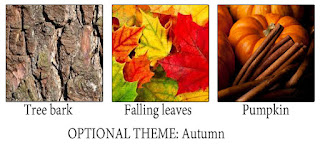
Here's your swatch for this month - and your (optional) theme. Don't forget you can win a great big bundle of Rubber Dance stamps AND you don't have to use Rubber Dance stamps to enter.

I created a quick tag this month with a whimsical feel - a sort of forest sprite peering from amongst the leaves. I used the same technique on the leaves as for the wreath I posted yesterday - so follow the link there for a step-by-step. The background is simply stamped with the Burlap image from Rubber Dance and a speckly stamp that comes with the For the Birds set.


See you soon!
Katy x

I used these awesome Rubber Dance stamps:

STOP PRESS: A little gift for my readers - use code katy2015 to get 15% off your total order at Rubber Dance!!!

Burlap

I Love Leaves


Twiggy Leaves

For the Birds

Collage Mix

Thursday 1 October 2015

Shades of autumn over at ColourArte


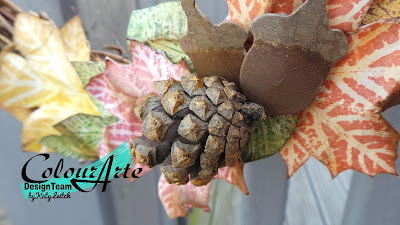
It's my turn on to do a tutorial at ColourArte today - I made an autumn wreath and this is a sneaky peeky of my make.

You can see the full step-by-step on the ColourArte blog.

Katy x