Thursday 25 February 2016

In case you were wondering...


...what I was up to at Stitches - here's a short video of one of the techniques I was demoing for Grafix and Sakura.

I'm using the Grafix Impress Monoprinting Plates - fantastic value alternatives for monoprinting which can be used with any kind of paint or ink.


Here I've used them with Koi brush pens (lush product with SO much pigment!) to make a watercolour effect print.

I hope you enjoyed my video - more to come soon!
Katy x


Wednesday 24 February 2016

Sparkle in the Rain for Visible Image


I have a card to share with you today using another of the new stamp releases (you may have seen them on Create & Craft recently). This card uses Sparkle in the Rain from the new releases and some old favourites too.

I've got a short video for you on how I made it:


Thanks for visiting today:)
Katy x

I used these Visible Image stamps:


Thursday 18 February 2016

Journal page for ColourArte


Yep my turn again! Stepped out tutorial over on the ColourArte blog today - I used yummy Radiant Rain sprays this time. Told you I was stepping away from my blue comfort zone this year - you proud of me???

I know some people like to know, so that BIG stamp is Donna Downey - it's foam and she did a few of them but sadly no more (I wish someone would do more big giant stamps like this!). The words are from a really sweet quote set by Crescendoh.

Katy x

Thursday 11 February 2016

Distressed Journal


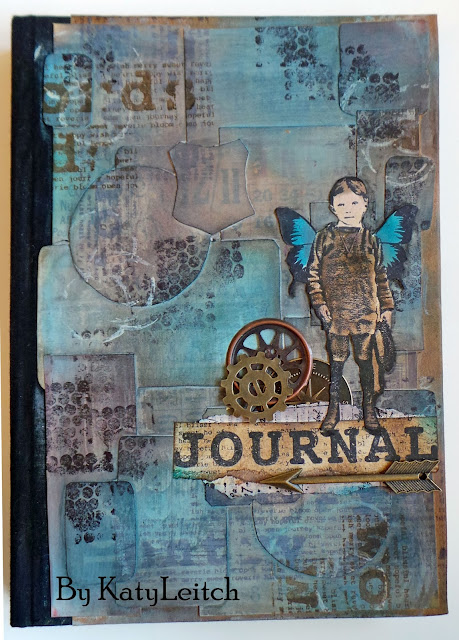
Just a quickie post today - a vintage style journal I made. I kept it nice and flat so it's practical to use as I intend to write my notes in it. My fave blue and brown combo is making an appearance again!


Here's how I made it:
1) Collage a background using elements cut from Tim Holtz papers. Cover it with gesso, thinned down so you don't obscure all the detail.

2) Add Distress Inks in Stormy Sky, Broken China, Gathered Twigs and Walnut Stain. Add background stamping (PaperArtsy) with Walnut Stain and also Archival Inks in black and Potting Soil,

3) Stamp journal (PaperArtsy) onto a scrap of card and ink it up, Mat with scraps of book page. Stamp the boy (Paperbag Studios) and colour him too. Outline him with Stabilo All pencil and a water brush. Embellish with metal pieces to finish,

That's it for today :). See you soon!
Katy x

Wednesday 10 February 2016

Shine for Visible Image


Hello there! My make for the Visible Image DT today uses two of their BRAND NEW releases which are now available to pre-order. As soon as I saw the Shine Bright stamp I knew I wanted it. Something that little bit different...


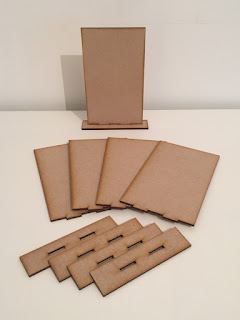
Also new are the MDF monoliths which are perfect for making pieces for display and also for practical makes (more on that from some of my teamies to come). I've created something purely decorative today.

Here's how I made it:

1) To create the background I layered scrunched tissue paper over cardstock (you could also work straight onto the MDF if you prefer). I added a die cut clock and some string before painting the whole thing with black gesso,

2) When the gesso had dried, I dry-brushed all over with paint in purple and blue shades (I used DecoArt Media Fluid Acrylics). After that, I dry-brushed a very small amount of white gesso onto some of the raised areas.

3) I painted some die cut cogs with silver metallic paint (also DecoArt Media) and added them to the background along with some washers and nuts from the DIY store.

4) I stamped the light bulb onto white card and coloured it with Distress Inks (Mustard Seed and Wild Honey). I added silver Sakura Gelly Roll metallic pen to the lower parts.

5) I then stamped the lightbulb again onto Dura-Lar film using StazOn (you could use acetate instead). The Dura-Lar can be heated and gently shaped and here it's curved gently to resemble a 'real' lightbulb. Apply more silver pen to the back of the film light bulb and glue it over the card one, just adding the glue towards the base where the black stamping will hide it.

6) Stamp a portion of the 'inspire' dictionary stamp onto a scrap of card, swipe lightly with Distress Ink in Mustard Seed before securing behind a bookplate.

Hope you LOVE this stamp as much as me!

Katy x

I used these fabulous Visible Image products:


Sunday 7 February 2016

Sunday Freebie


Here's today's freebie - hope you like it! Something a little different - and quite retro in feel this week - some vintage bottle tops.

Click on the image to download at full res.

Any requests for future freebies??? What are your favourite types of download? Would you enjoy digi 'stamps' of vintage images? Let me know!

Katy x

Thursday 4 February 2016

Journal Page for ColourArte


My turn again to do a tutorial for ColourArte today, and you'll find a full step-by-step over on their blog.

I also have a how-to video for you. It's just over three mins so nice and concise! Getting quite into this video malarkey now!


See you soon I hope.

Katy xxx

Wednesday 3 February 2016

Shabby Journal Page


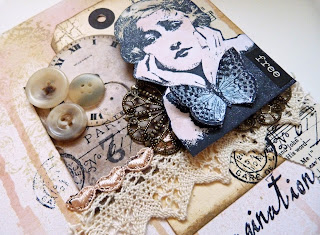
Feeling a bit of a vintage vibe this week so I've created a shabby looking journal page today  - for once for no other reason than I felt like it! The background is Distress Sprays in Tattered Rose and Antique Linen - spritzed at the top then allowed to drip down the page. I love this soft colour combo and loving the drips - will do this technique again I am sure.


Other than that it's just a bit of layering and stamping. My stamps are Lost Coast (lady), Visible Image (phrase) and Tim Holtz (damask shape and Paris postmark).

Thanks for popping over!
Katy x


Tuesday 2 February 2016

Giveaway winner!

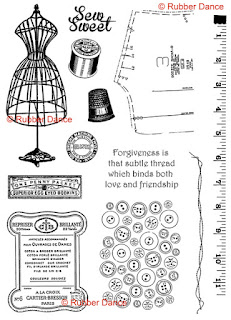
Sew Sweet stamps from Rubber Dance

And the winner of my stamps is.......................

Beautiful stamps Katy - and love how you've used them! Thnks for the chance to win them! Hugs Rachel x

Congrats Rachel - please email me (link in the sidebar) or FB message me with your postal address.

Another giveaway coming soon on my Facebook page.

Thanks to everyone who entered :)

Katy xxx