Monday 23 October 2017

Antiqued Frame for Stampendous


I do enjoy a bit of upcycling and this project started life as a cheap plastic frame from the £1 shop.

Products used:
Stampendous Stamp: Strolling Skeletons
Stampendous Perfectly Clear Stamp Set: Spider Fear
DecoArt Gesso, Texture Sand Paste and Fluid Acrylics
Gilding wax
StazOn Ink

Here's a quick how-to:
Gesso a plastic picture frame with black gesso to cover it completely.

Mix Gold and Burnt Umber DecoArt paints to make a brassy colour. Dry brush this all over the frame.

Add a further layer of dry brushed black and gold gilding wax highlights.

Stamp the image onto mixed media paper. Ink with a beige colour to make it look old. Scrunch up the paper and flatten out again before inking over the highlights with a mid-brown tone to make them stand out.

Stamp the web onto the glass with StazOn.

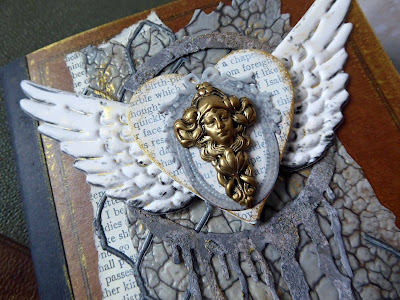
Use Texture Sand Paste and paints to create a rusty bookplate. Print off wording, age as before and add behind the bookplate. Finish with a cut out spider.

(Since completing this the paint has cracked in some areas where I think the frame material has resisted the paint because it's plastic. I actually think this is really cool! But to avoid it, sand the frame lightly first.)

Happy Hauntings!
Katy x

Monday 16 October 2017

DOTD Spooktacular Shrine for Stampendous


I just love all things Day of the Dead and this wonderful stamp set from Stampendous is no exception! I had lots of fun making this 'spooktacular' shrine!

Products used:
Stampendous Cling Stamps: Sugar Skull
DecoArt Chalky Finish Paints and Crackle Medium
Marker pens for colouring
Sakura Glaze Pen
MDF shrine kit

Here's a quick how-to:
Paint a shrine and base with Relic Chalky Finish, add Crackle Medium and when dry, a coat of Everlasting Chalky Finish over the top – allow to dry and crack. Edge with black ink.

Stamp lots of flowers and colour them in. Cut into some to make them smaller. Cut the leaves off others to use separately.

Glue the flowers all over the shrine as shown; add gems.

Stamp and colour the skull. Highlight the eyes and nose with a shiny pen (Sakura Gelly Roll) and add bling details. Secure inside the shrine with layers of cardboard to make it pop forwards.


Stamp the banner, fussy cut out and edge with black ink. Shape around a paintbrush handle before adhering – use lots of hot glue in the centre so it’s raised up.

Thanks for stopping by today,
Katy x

Monday 9 October 2017

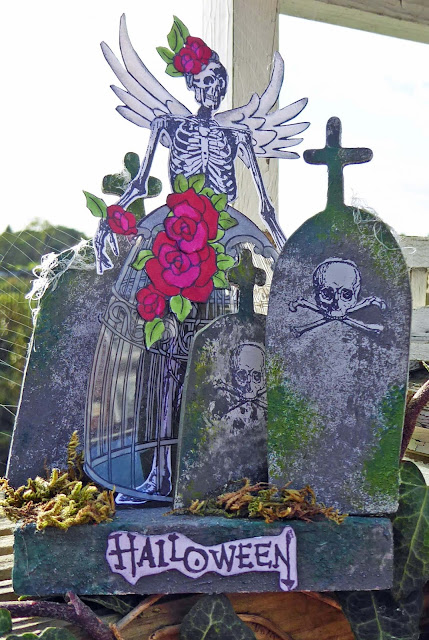
Graveyard Glamour for Stampendous


I do love to play with my stamps and explore new possibilities - here I combined two stamps to make my rather well dressed Halloween skeleton.

Products used:
Stampendous Cling Stamps: Andy Skinner - Birds & Bones; Angel Aviary
DecoArt Fluid Acrylics
Chipboard gravestones from Calico Craft Parts
Florist's moss

Here's a brief how to:
Stamp the skeleton onto white card and cut out. Stamp the fairy several times onto white card and once onto acetate. Cut out the skirt from the acetate. Colour the other images. Cut out the top of the skirt, her hair and various flowers.

Add crystal glitter to wings using glue pen. Use a permanent silver marker to highlight the wire structure in the skirt, working on the back of the acetate.

Assemble the ‘skeleton woman’ as shown.

To create the graveyard, treat a wooden block and MDF gravestones with Texture Sand Paste and paint light grey. Stamp the skull on the stones and mask it off. Add Relic Chalky Finish with a stipple brush. Follow with Viridian and Green Gold, also stippled in places, to mimic moss growing.


Adhere all elements to the plinth and finish with moss and some cobwebs made from hot glue gun ‘string'.

Happy Halloween!
Katy x

Wednesday 6 September 2017

Stunning New Stencils...


...from my lovely friend Deborah Wainwright! If you are looking for something a little different, look no further! I love the originality of Debs' designs and I've used her Boho-Jane stencil to make a journal page.

Here's how I made it:
1) Create a background by dipping some mixed media card into pools of Distress Oxide Ink. Keep some areas of white space.
2) Stencil the face in black permanent ink.
3) Fussy cut the Printables sheet and give her a floral hairdo! Add further flowers bottom left to complement. Doodle over the flowers.
4) Use paint pens to go over the stencil lines to give them real definition. Add pink pen to the lips and white paint pen to the eyes. I added gold pen to her facial details and nose piercing. Extend the neck with black pen.
5) Finish with a stamped sentiment (also by Deborah Wainwright for Rubber Dance) and doodled border.


You can buy the stencils in Deborah's Etsy store here.


For this piece I combined the stencil with one of my Printables - Flowers #1 - available here in my new Etsy store.


Thanks for stopping by,
Katy xxx

Sunday 3 September 2017

Teeny Seth Apter Inspired Mini


A new challenge blog has launched this week, Mini Album Makers' Challenge, dedicated to the art of book making. I've been inspired by Seth Apter in my creation, who is the sponsor for this month's challenge. It's based on a tiny album he created a while back. I adore dinky things so was inspired to make my own, incorporating his dies and stamps, of course!

I've made a wee video so you peek inside.

Thanks for visiting!
Katy x

Monday 14 August 2017

Mixed Up Challenge - Cork


Hello! If you've found your way here from the Mixed Up mag blog - welcome to our first challenge! If you didn't, then check out the challenge here - there's a great prize of a big bundle of chipboard from I Kropka to be won.


The theme is 'Cork', so for my contribution I thought I'd have a go at creating some DIY stamps from wine corks. I may have a few lying around.....


Cork is a bit flaky (like me!), so you can't be too precise with it. It has a tendency to do what it likes, to split and fracture - so go with it. Abstract is the way forward!

I used a lino cutting tool to create these two 'stamps' - on one I gouged out some channels and on the other kind of 'scooped' out little areas by twisting the tool in a circular motion. You can also use a craft knife, which will give you neater results. Two lovely mark making tools - for FREE! Can't be bad!

I used both stamps on my ATC, which is just a bit of scrap from a Gelli print, finished with a Stampotique image and a phrase from one of my printables (coming to the Mixed Up mag website soon).

Can't wait to see what you make for the challenge!
Katy x

Friday 11 August 2017

An Untold Story with Sin City Stamps


Super excited to have received my new (and first!) stamp set for Sin City Stamps! I work in all kinds of styles but vintage has been a constant theme in my work over the years and I've never grown tired of it. Actually, although based on vintage images, this set is pretty versatile and can be use in a modern context too. You can get them here. I have to say I am so pleased with the quality - they are really thick and beautifully cut! Thanks so much Kim!
Correspondence stamps retail at $18.99 USD (shipping to the UK is $6)
I didn't take any step pics for this one but I'll talk you through what I did.

This page is in my junk journal which is an old poetry book. First off I obscured the text a bit with DecoArt Media Titan Buff paint (watered down).

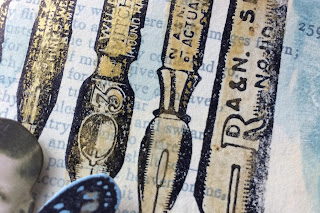
I stamped the pen nibs directly onto the paper with black Archival, masking off the largest one so they fit better on my page. They are lightly coloured with Kuretake Gansai Tambi Starry Colours watercolour paint - I wasn't too heavy with the paint so I didn't obscure the stamping. The pen at the foot of the page is coloured the same way.


My ink bottle is stamped in StazOn Ultramarine and the highlights are caught with Tumbled Glass Distress Ink. I stamped the label again and distressed it by crumpling it up and then inking with Antique Linen/Vintage Photo Distress Ink. The text background is stamped onto card which has also been inked/distressed and then torn.


The Tim Holtz Paper Doll has wings (not from my set - but we've all got 100 butterfly stamps, right?). I gave him wings to fit with the stamped quotation 'There is no greater agony than bearing an untold story inside you." I thought it was fun and quirky to have him 'sitting' on the ink bottle.


At the end it all looked a bit brown so I added a very watery wash of DecoArt Media Prussian Blue Hue (I also coloured the wings with this and the Kuretake watercolours). I treated the acrylic a bit like watercolour by making it very runny and allowing it to pool on the page - it has soaked in more where there is no paint and less where the Titan Buff layer was applied - which I really like.

Hope you like my make and my stamps!

Don't forget to tell YOUR creative story!

Katy x

Wednesday 5 July 2017

Whaley McWhaleface


Meet Whaley McWhaleface, the newest addition to the smallest room in the house! I find workin with decoupage papers so relaxing and love making things for the home. This piece consists of a pre-made whale blank and a wooden block which was part of a Christmas sign that read 'NOEL'.

Products used:
Blanks for covering
DecoArt Decou-page Papers: Ship to Shore
DecoArt Decou-page Glue: Gloss
DecoArt Media: Gesso - White
Heart punch
Wire and twine

Ship to Shore decoupage papers

Here's how I made it (no step photos I am afraid - this was laptop TV crafting!):
1 Prime the blanks with white gesso.
2 Tear the blue paper into small pieces and use the Decoupage glue to adhere the pieces to the whale - apply a generous coat under and over each piece to ensure they adhere really well.
3 While that dries, cut strips of the white and red papers and adhere them using the Decoupage to the base. Cover the join with twine.
4 Tear some white paper into strips and scrunch them up. Apply to the top of the block with Decoupage glue. Try to retain the texture as this is meant to simulate white water,
5 Cover some thin card both sides with red paper and punch out hearts. Apply the hearts back-to-back to the ends of some pieces of wire.
6 Poke a hole in the top of the whale and fill with strong glue. Push the wires into the hole. When dry, manipulate them into position as desired.
7 Finally, very lightly sponge white gesso onto the tail and fins of the whale.

Hope you like him - I rather do!
Katy x

Wednesday 14 June 2017

Bright and Breezy Box


Hello! Today I'm sharing a box I altered to store some of my inkpads. The style is a little different for me but I think it's rather jolly and is certainly an improvement from a boring brown box! I used mainly DecoArt products to transform it - list of materials at the end of the steps.

I need to thank Erica Evans and Debs Wainwright for inspiring me to get this little project done - thanks girls! Thanks also to Sue Roddis for the box!

Here's how I made it:

I forgot to take a picture of the blank box - doh! But it was ugly brown wood. I started with a coat of Everlasting Chalky Finish by DecoArt - look at that coverage onto varnished wood!

I then added tissue paper all over with DecoArt Decou-page Matte. When dry I covered the whole thing with DecoArt Translucent White to tone down the tissue design.

Using a dabbing motion, apply patches of Green Gold and Cobalt Teal Hue Media paints (I do have other colours - honest!!!). 

Add stencilling with a couple of Andy Skinner stencils (Halftone and Creativity) using the same colours of paint (I mixed the Teal with Tinting Base to make a tint). Add tone-on-tone stamping using various stamps (Stampers Anon and Carabelle) and toning ink colours. Make sure you use permanent ink.

Add circle stamps (Seth Apter) in darker blue ink. Stamp some numbers (Rubber Dance) in white gesso.

Use black gesso and a stencil brush to cover the box with circles (this is a Donna Downey Studios stencil).

When dry hand draw hearts with permanent marker. Stamp some inspirational words here and there. Colour the hearts with pink paint created by mixing Pyrrole Red with Tinting Base. I also sponged more blue paint to the edges to define them. Finish the box with a coat of varnish (I went for Soft Touch which has a satin finish).


Thanks for popping by!
Katy x

Products used:
DecoArt Media: Gesso - White, Gesso - Black, Tinting Base, Soft Touch Varnish
DecoArt Media Fluid Acrylics: Cobalt Teal Hue, Green Gold, Pyrrole Red
DecoArt Chalky Finish: Everlasting
DecoArt Decou-page: Matte
DecoArt Andy Skinner Stencils: Halftone, Creativity
Donna Downey Stencil: Dandelion Pods
Tissue paper
Various stamps
Permanent inkpads in blue and green

Wednesday 7 June 2017

Dreamer


Today I'm sharing a project I created a while ago for That's Crafty (it was on the TV don't you know!!!). I don't have a full step out but I do have some 'in progress' shots which help to show how a project like this develops from ugly to lovely, by using plenty of layering. It's also a good demo of how easy mixed media can really be. The paints I used are of course from DecoArt Media.

1) After applying a layer of white gesso to prime, I used a piece of kitchen sponge cut into a rectangle shape to pounce two colours of paint onto all the pieces. I didn't try to be precise but I made sure that the paint only mixed in some places, so I got three colour tones distributed randomly. This requires a skill level of about age 3! But it's totally fun to do!

2) I built over the painty background with lots of mark making. I used white and black gesso through the That's Crafty stencils. I loaded my brush really lightly on purpose to get that faded out effect. I mixed the green paint with white Tinting Base to make a tint and also added that through a stencil. The rings are made with the lid off a deodorant bottle.

3) The piece is simply finished with stamping. Some of the images (like the hearts on this side panel) are stamped directly onto the background - use Archival or StazOn as these will dry on paint.

4) The other images are fussy cut out and layered up. I stuck to two colours of ink and used red as my accent colour to directly contrast with the green. 


Thanks for stopping by, see you soon.
Katy x

MATERIALS:
That's Crafty MDF Triptych - House
That's Crafty Stencils: 006, 029, 076
Dina Wakley Media Cling Mount Stamp Sets - All The Gals, Silhouetted Women, Collaged Hearts
Carabelle Studio Stamp Sets - Le Coeur et L'oiseau by Zorrotte SA60182, Reach For The Stars by Birgit Koopsen SA60119
DecoArt Media Fluid Acrylics – Green Gold, Cobalt Teal Hue
DecoArt Media - Tinting Base, Black Gesso
Archival Ink – Red Geranium, Jet Black
Book rings

Monday 15 May 2017

A Whale's Tale for Stampendous


Our theme at Stampendous this week is 'Under the Sea' and for this make I used one of my favourite stamps from the new release, Stylised Whale; I love the 'Zentangle' detail on this stamp. I chose to use it slightly differently, focussing on just the tail. I'm lucky enough to have been whale watching and this bit is about all you get to see coming up through the waves!

Here's how I made it:

1 Colour some book pages with spray inks and sprinkles of FX powder in tones of blue and green. 

2 Draw wavy shapes at random and cut along the lines. Edge each piece with Dreamweaver Embossing Paste using a palette knife to simulate white water in the waves.

3Cover a Tando board with book paper then add white gesso and some light areas of ink. 

4 Colour (I used alcohol markers) and cut out the whale; also stamp and cut out a Laurel Burch sentiment. 

5 Assemble as shown adding the whale behind the book page 'waves'. Use some silicone adhesive behind the whale’s tail to lift it slightly. Glue the sentiment in place.


Products used:
Stampendous Cling Stamp: Stylized Whale
Stampendous Laurel Burch Perfectly Clear Stamp: Geo Floral Wishes
Dreamweaver Embossing Paste - Regular
Dreamweaver FX Powders
Tando Creative Media Board

You can see my project and get a print-friendly version here on the Stampendous website.

Thanks for stopping by,
Katy x

Friday 28 April 2017

Guesting at Canvas Corp Brands


I was lucky enough to be asked (thank you Ewelina!) to be a featured blogger for Canvas Corp Brands and was sent a package of lovely goodies from the new 7gypsies Architextures range.


You can see my pieces in full, including step-outs, on their blog today.

Katy x

Wednesday 26 April 2017

Two Minute Journal Page Background


Today I'm sharing the results of a challenge set by my dear friend Lou Withers on her Facebook group Junk Journal Junkies (check it out - it's a very friendly, happy place!). The challenge was to create a background for a journal spread in two minutes. Of course I turned to my favourite DecoArt Fluid Acrylics and bashed this page out!

In fact it only took 15 minutes to complete the whole thing and I'm actually really happy with it. Sometimes just going with the flow can really work (and sometimes I make something unspeakable!).


Hope you enjoy the video. See you soon.

Katy x

Products used:
DecoArt Media Fluid Acrylics: Green Gold, Cobalt Teal Hue, Payne's Grey, Cobolt Turquoise Hue
Dina Wakley stamps
Washi tape

Thursday 20 April 2017

ATC Triptych for DecoArt Media


I've got a video to share today using DecoArt product which shows you a couple of different ways you can make use of your stencils. This is a variation on a make-&-take project I originally created for the Ministry of Mixology retreat last year. It uses chipboard ATCs from Tando as they are nice and sturdy and don't mind the layers of wet media.


Products used:
DecoArt Media Fluid Acrylics: Cobalt Teal Hue, Cobalt Turquoise Hue, Pyrrole Red, Metallic Silver
DecoArt Media Gesso - White
DecoArt Media Tinting Base
DecoArt Americana Decou-page - Matte
DecoArt Andy Skinner Stencils: Halftone, Timewarp
Stampendous Andy Skinner stamps: Curiosity, Handle with Care
Stampendous Frantage: Pearlised Mica Flake
Tando Creative: ATCs
Chipboard heart, metal embellishment and washi tape


Thanks for stopping by!
Katy x

Monday 20 March 2017

Chipboard Pendant for DecoArt


I used to do a lot of jewellery making but I kind of got out of the habit (and frankly I don't get enough time to do one hobby let alone two!). But there is something really nice about wearing pieces that you've made yourself so today I've combined mixed media with jewellery to create a chipboard pendant. Chipboard is cheap, lightweight and easy to work with. A couple of coats of gloss varnish make the piece relatively sturdy to wear - but avoid going out in a monsoon as it's still basically made of paper!

DecoArt products used:
Media Fluid Acrylics - Pyrrole Red, Pyrrole Orange
Media Gesso - White
Metallic Lustre - Gold Rush
Media Varnish - Gloss


Other:
Tando Creative Chipboard (from their offcuts pack)

Crafter's Companion Stamps by Deborah Wainwright
Permanent black inkpad

White paint pen
Printed word

Here's how I made it:

1) Cover the chipboard piece with white gesso front and back to prime it.
2) Apply red and orange paints randomly with your fingers to get a two-tone background. Repeat on the back.
3) Allow to dry then stamp over with an image in black ink and apply a printed word. Also stamp a partial image to the back to finish it off neatly.
4) Apply two coats of gloss varnish, allowing drying time between coats.
5) Finish with dots of white paint pen and gold lustre all around the edge.
6) Add a glue bail and some faux suede cord if you want to wear it - or use an embellishment if you don't!

Katy x

Friday 17 March 2017

Stampendous/DecoArt Blog Hop - Handle with Care


It's the last day today of our our joint Stampendous/DecoArt Blog Hop and I'm sharing a mini journal page with you. I recently treated myself to a tiny weeny Moleskine watercolour journal and I love working in it - the small size is perfect for quick journaling or journaling on the go. I'm using this specific journal for mindfulness and self-care so there is a theme running through it which is echoed in the sentiment on this page - a reminder to be gentle with myself!


Prizes!!!!! Comment to win one of three HUGE prize packages that includes Andy Skinner stamps and DecoArt Media™ Paint plus more!  US winners only, see Stampendous Official Contest Rules here for more details.

Today's Hop List:

Stampendous Blog

Pam Bray

Jamie Martin

Louise Healy

Asia King

Janelle Stollfus

Lea Fritts

Alison Heikkila

DecoArt Blog


Here's how I made it (apologies for the state of the photos - it was late at night!):

1 Use a paintbrush, bottle lid and credit card to make marks in Payne's Grey paint onto the journal page (this is a technique I learned in Nathalie Kalbach's Creative JumpStart and I love it!)

2 Apply Cobalt Teal Hue and Cobalt Turquoise Hue paints over the top - the Fluid Acrylics from DecoArt are translucent and let all those lovely marks show through!

3) Colour a die cut heart with Pyrrole Red paint. When dry, stamp with the heart from the Handle with Care set to add texture.

4) Add random background stamping using Andy's Steampunk set. Add stencilled dots using the Pixelated stencil from DecoArt. Draw around the heart die cut with a Stabilo All pencil and blend out the pencil to create a shadow. Add scribbly lines with a paint pen.

5) Glue the heart in place and doodle around with white paint pen. Stamp the sentiment from the set and cut it up. Ink the edges to distress before sticking it in place.

Thanks for your visit today! Don't miss the other blogs.

Katy x

Thursday 16 March 2017

DecoArt/Stampendous Blog Hop - Specimen2675


Welcome to day four of the Stampendous/DecoArt blog hop - hope you've been enjoying all the inspiration so far! Today I've used Andy's Skulldoggery stamp set to create a kind of faux fossil effect on a tag.

Comment for a chance to win one of three HUGE prize packages that includes Andy Skinner stamps and DecoArt Media™ Paint plus more! US winners only, see Stampendous Official Contest Rules here for more details.

Here's the hop list for today:

Stampendous Blog

Louise Healy

Elly Pirally

Lea Fritts

DecoArt Blog


Sorry, I didn't manage to take any step pictures of this but briefly here's how I made it:
1 Cut a tag from mixed media or watercolour paper - something that can take wet media.
2 Squeeze drops of Yellow Oxide, Burnt Sienna and Raw Umber paints onto a craft sheet or other non-stick surface. Spray generously with water.
3 Swipe the tag into and through the paints - lightly so as not to over-mix the colours. Dry and repeat until you like the result. I was aiming for a look similar to natural rock (did I manage it?).
4 Stamp and heat emboss the skull stamp with white Stampendous embossing powder. When cool, add a wash of Yellow Oxide paint to tone down the white a little bit and blend the skull into the tag.
5 Finally stamp the wording in black, distress the edges of the tag and mat onto black cardstock.

Katy x